TOP 5 TIPS FOR USING REVERB CREATIVELY IN YOUR MIX AND PRODUCTIONS
Too much Reverb can make a sound feel washed out or too far back in the mix; too little can make an instrument or vocal far too dry without special sauce. It’s about finding balance to bring a mix and song to life. So let’s go over 5 tips and tricks for using Reverb creatively in your mix and productions.
1) Using FX Sends To Control Reverb Amount

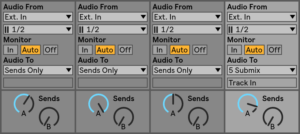
FX sends are one of the best ways to get more control over your reverb. This also works just as well with delays or other effects. The basic FX send means that you send out a an audio track/midi track/bus to another Aux channel that contains your FX. You apply full 100% wet reverb on the Aux Channel and you can adjust the Aux/FX Channels levels with the fader on the mixer. This can also open up a world of options in terms of automation. Let’s say you want to hit the chorus hard with heavier reverbs, but other sections with less. You can try automating the reverb tail amount, tone or character, as well as the volume level itself. This allows you to be able to get full control over sections of the song that may need more or less reverb application while still retaining the sound of the original dry element(s). This called Parallel Reverb. Parallel meaning you have two (or more) different signals running together simulataneously. In this case it’s the Dry signal and the Reverbed auxiliary signal.
2) Using Sidechain To Duck The Reverb
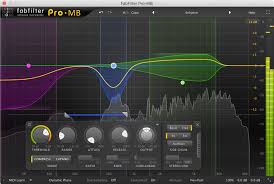
This is a really handy trick when you are using the technique 1 above. The core intention of this technique is to duck the reverb signal while the Dry signal  is live. This can prevent washing out your dry signal, while still getting the magic of the reverb tail. Let’s use a vocal as an example. In our DAW we setup a send from the Vocal to the Reverb Aux Channel. After the Reverb in the chain, we apply a side chain multiband. You can use a standard sidechain compressor to do this technique. However I prefer using Multiband processing such as Fab Filter Pro MB with the expert/sidechain function in place. This allows you to choose which area of the frequencies you want to duck and allows for more control.
Technique With Fab Filter Multiband: You then want to send the vocal out another bus and this will be your Sidechain input (top left corner the Key symbol in Fab Filter MB). Now in the Fab Filter Multiband, allow it to react from the signal coming in from the vocal. Once your vocal is being performed/played back it will pull the reverb down and once it is done talking or singing, the tails will come back up and take off into another world. This is, of course, if you apply loads of reverb tails. So the decay matters and I would suggest using a long decay. Print as needed and cut or edit. This also works wonders with a combination or Reverb, Delays and Automation BEFORE hitting the side chain multiband.
Technique With Sidechain Compression: Instead of working Multiband features, this technique is more simple at the sacrifice of being able to control which frequencies are being reduced. The idea is to use the Dry vocal as a Sidechain Compression Trigger to duck the reverb tail. You will need your dry vocal on it’s own track, your Reverb Auxillary Send (This is setup up differently depending on the DAW), and a “Trigger Track” which you route your dry vocal too.
The dry vocal track runs, there is a send from the Dry Vocal to the Trigger Track, as well as your Reverb Aux Channel. The idea is to put a side chain compressor after the reverb device, with the receiving signal coming from your Trigger Track. This will duck the reverb while the dry vocal is live, but immediately bring the reverb tail in after the dry signal has decayed fully.
3) The Beatles trick goes a long way
Legend has it that The Beatles that came up with this very unique process to get haunting sounding reverbs and effects into your song. Originally this was done with the a tapes reel-to-reel. Let’s use vocals again for this example. You would have a voice ran into a tape reel recorded and then you would flip the tape and play it backwards (already getting creepy), but it doesn’t stop there. After flipping the tape backwards you would apply a very long decay reverb while recording it back in to the next reel. This would then be flipped back to the original forward playback which means the reverb tail is backwards and the voice is forward. Sound confusing? Thats OK, let’s break it down for the Digital world.
Step 1 – Duplicate your vocal audio channel
Step 2 – Flip the voice backwards on the second audio channel
Step 3 – Apply a nice reverb with a good long tail. Let it sound like the tails are flowing between the words but still leaving room to breath.
Step 4 – Print/Bounce/Export this backwards + reverb vocal channel. (if exporting then bring back into the session.)
Step 5 – Reverse the audio file you just printed or exported
Step 6 – Align the Backwards Reverb vocal to the original dry one and make it so the first words land right.
There you go. Haunting as hell and super cool! This can be used on other elements too like drums, synths or guitars. Whatever you want to make creepy and unique!
4) EQ the Verb
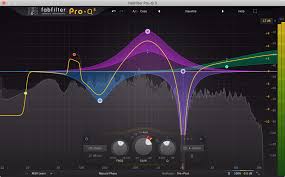
EQ goes a very long ways in the land of Reverb. One of the best tricks is to EQ after the reverb on the reverb fx channel (as we were speaking about with  sending reverb to an Aux FX Channel). I suggest doing both a low cut and high cut until it you have isolated only the frequency areas you want. This way the sibilance of a voice (for instance) wont be caught by the reverb. This can also allow you to warm up or add depth to only certain areas of the frequency spectrum depending on the instrument or sound source.
5) Chain Order DOES Matter. Experiment
You can get amazing results if you add FX to your reverb channel the same way you would for processing instruments. I am talking Compression, EQ, Saturation, and others. For example: Let’s say you send a Dry vocal to a Reverb FX Channel and you want more tail of the reverb but also want it to sit better on the transients of the voice. One good technique would be to EQ before the reverb, then run a heavy compression after the reverb. This will give you control on what is reacting to the reverb along with smashing the reverb down to give it more of a glued sound. Also sending the reverb channel to the mix bus is common but try running it back into a vocal bus that is already processing the lead vocal. This will give you even more gluing and will sit even better with the processing your vocal bus chain is doing. Try stereo imagers and chorus or delays. Endless possibilities!
So now that we realize that there is plenty of ways we can use reverb to spice up our music, I say to keep experimenting and trying new things. Thats how great ideas come about in the first place! By either happy accidents or because someone decided to break the mold and do something new. There isn’t really anything right or wrong with reverb unless you start talking about certain technical things such as low end or mid/side and where to put the reverb in the mix. But thats for another day and another article. The most important thing is to study up on the different types of reverb such as Plates, Room, Hall, Chamber, and how these can each be applied artistically. I especially like gated reverb on snares and rooms on vocals for the specific style I am interested in. But vocals also work great with Plates or Halls. Once again, its entirely up to you on how you want to use reverb in your next production or mix!
